Fetching data with useDataQuery
In this tutorial, you will do the following:
- Get started with
@dhis2/app-runtime - Learn how to define data queries
- Fetch data using the
useDataQueryhook
1. Getting started
What is the DHIS2 Application Runtime?
The DHIS2 application runtime allows us to communicate with the DHIS2 Web API in a declarative way - which means that we can define queries and mutations or make these requests without explicitly providing all the steps that must be performed to achieve our desired result.
The app runtime is responsible for performing those steps for us, facilitating the application development experience when interacting with the DHIS2 API.
Installation
You can manually install the DHIS2 app runtime in your project by adding the @dhis2/app-runtime dependency.
yarn add @dhis2/app-runtime
2. Define data queries
First, let's define a simple data query to fetch and display the results.
In this example, we'll use the programs resource from the DHIS2 Web API (the resource must be a string value corresponding to a DHIS2 resource).
The data query below is an object that specifies the type of resource that we want but we can also declare a list of parameters that we need (pageSize and the fields array in this case).
Note: the names (keys) of the parameters must correspond to the parameter names in the DHIS2 API.
// ...
const myQuery = {
    results: {
        resource: 'programs',
        params: {
            pageSize: 5, //fetches 5 first programs in the system
            fields: ['id', 'displayName'],
        },
    },
}
// ...
3. Fetching data
As mentioned earlier, the app runtime makes it very easy to fetch data from a DHIS2 instance without having to manually make these requests.
To do this, it uses React Hooks and all we need to do is define declarative queries and then use the provided hook to perform the actual request.
We have already declared our data query above, now let's use it! 👇
Import useDataQuery
Let's start by importing the useDataQuery hook from the @dhis2/app-runtime:
import { useDataQuery } from '@dhis2/app-runtime'
// ...
Use the useDataQuery hook
Next, let's define a React functional component MyApp which will use the useDataQuery hook.
Notice that it also gives us easy access to the error and loading variables (which respond to state changes) as well as a data object where the fetched data is going to be stored.
We then pass the myQuery object to the useDataQuery hook - see the highlighted line of code below:
import React from 'react'
import { useDataQuery } from '@dhis2/app-runtime'

const myQuery = {
    results: {
        resource: 'programs',
        params: {
            pageSize: 5,
            fields: ['id', 'displayName'],
        },
    },
}

const MyApp = () => {
    const { loading, error, data } = useDataQuery(myQuery)

    if (error) {
        return <span>ERROR: {error.message}</span>
    }

    if (loading) {
        return <span>Loading...</span>
    }

    return (
        <div>
            <h1>Programs</h1>
            <ul>
                {' '}
                // Render a list of 5 programs
                {data.results.programs.map((prog) => (
                    <li key={prog.id}>{prog.displayName}</li>
                ))}
            </ul>
        </div>
    )
}

export default MyApp
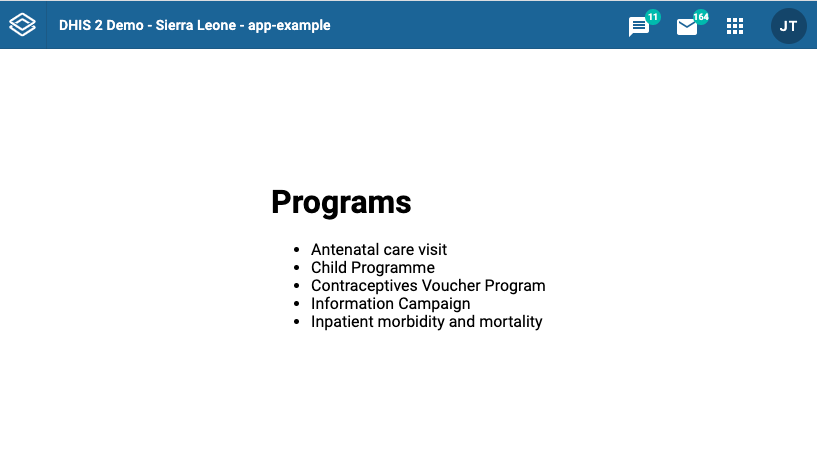
Check your browser
Finally, you should be able to see the list of programs in your browser:
That's it for fetching and displaying data from a DHIS2 instance API! 👏🏽
More examples?
- Please check the app runtime documentation for more examples like this one
- You can also try to follow this exercise on data queries from the web app academy 2021
Want to learn more?
-
Check the DHIS2 application runtime documentation or watch this short video presentation introducing the app runtime (about 30 min)
-
Get an overview of the DHIS2 Web API in this video presentation (about 30 min) or check out the DHIS2 Core Web API documentation
What's next?
In the next section, you’ll learn how to use the useDataMutation hook to mutate or write data!