How to add translation support to an application
Follow this quick guide to add translation support to your application using the d2-i18n package. The d2-i18n package uses the i18next library to monitor and generate translations in your application, check out the i18next documentation for more information on how the library works.
Prerequisites
This guide assumes that you're developing an application using the DHIS2 Application Platform and its tools. To know more or get started, please follow this tutorial: Environment Setup.
Install required packages
Install the d2-i18n and d2-app-scripts packages using the following command:
yarn add @dhis2/d2-i18n @dhis2/cli-app-scripts
Add a locale to your application
Follow the steps below to add a locale to your application:
- Add an
import i18n from './locales/index.js'statement to yoursrc/App.jsfile:
import React from 'react'
import classes from './App.module.css'
import Test from './test.js'
import i18n from './locales/index.js'
- In the source files containing strings you want translated in your application interface, indicate the strings to translate using the
i18n.t()syntax:
const MyApp = () => (
    <div className={classes.container}>
        <h1>{i18n.t('Hello world!')}</h1>
    </div>
)
For more syntax examples, read the i18next syntax section.
- Run
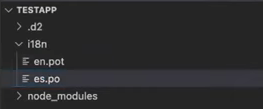
yarn startoryarn buildto build or rebuild your application. This will generate two files:./i18n/en.potand./src/locales/en/translations.json. - Navigate to the
./i18n/en.potfile and create a copy of it. Name the copy using the locale you want to add to your application and the.poextension. For example:es.poif you want to add Spanish support.
- In the
.pofile, type your translations in themsgstrstrings:
msgid "Hello world!"
msgstr "¡Hola el mundo!"
- Run
yarn startoryarn buildto rebuild your application. This time the translations you provided in the.pofile are added to thesrc/locales/en/translations.jsonand a newsrc/locales/{your_new_locale}/translations.jsonfile is created. Your application will fetch translations from these files whenever a user switches to another locale in the UI.
- Make sure you only have one
@dhis2/d2-i18n. - The
i18n.t()translation lookup needs to happen at render time. - The generated files (
src/locales/{locale}/translations.json) should not be committed to your repo. - Ensure only one version of dependencies having translations.
- The App Platform generates
./src/locales/index.jswhich MUST be imported somewhere in the app, usually in./src/App.js.
Extract translation strings
Once you have installed the d2-i18n and d2-app-scripts packages, all i18n.t() strings are automatically extracted and stored into the i18n/en.pot file whenever you run yarn start or yarn build.
To run the extraction of the translation strings individually, use the following command:
d2-app-scripts i18n extract
Generate localization files
Once you have installed the d2-i18n and d2-app-scripts packages, localization files (translations.json) are automatically generated whenever you run yarn start or yarn build.
To run the generation of the localization files individually, use the following command:
d2-app-scripts i18n generate
i18next syntax
Simple translation
i18n.t('translation string')
Interpolation
Interpolation is one of the most used functionalities in i18next. It allows for the integration of dynamic values into your translations.
const numberOfDevs = 30
i18n.t('hello world We are {{numberOfDevs}} developers', { numberOfDevs })
Plurals
Plurals can be combined with interpolation.
i18n.t('{{count}}' likes,
      { count: likedBy.length,
        defaultValue: '{{count}} like',
        defaultValue_plural: '{{count}} likes'
      })